
ViveTool is a powerful utility that allows users to unlock hidden and experimental features in Windows Insider builds. While this tool provides exciting opportunities to explore new functionalities, it can sometimes lead to system instability or unexpected behavior, as these features may not be fully tested or optimized for all environments. If you encounter issues after using ViveTool, it’s essential to take the right steps to identify and resolve the problem without causing further damage to your system.
We’ll walk you through practical steps to troubleshoot and fix any issues caused by ViveTool. Whether it’s a feature causing crashes, system slowdowns, or other disruptions, we’ll cover how to disable problematic features, roll back system changes, and more to restore your system to a stable state. It’s important to approach this methodically to ensure your Windows system is running smoothly once again.
Identify the Problem
Identifying the problem is the first and most crucial step in troubleshooting issues caused by ViveTool. This helps you determine what went wrong and what specific changes need to be reversed. Here’s how you can approach identifying the problem:
1.Analyze the Symptoms
System Instability: Does your system freeze, crash, or become unresponsive? Are there noticeable slowdowns or performance issues?
Tip: If your system becomes unresponsive, it could be due to a feature that conflicts with existing system settings or hardware drivers.
Feature Malfunction: Is a specific feature you enabled with ViveTool not working as expected?
Example: If you enabled a new visual feature (e.g., rounded corners or a new taskbar style) and it doesn’t display properly, this feature might be causing the issue.
Error Messages: Are you seeing error messages related to Windows or specific programs? These messages can often point directly to the cause.
Example: An error message like “This feature is not supported” or “Unable to load” might indicate a compatibility issue with your system or a conflict between enabled features.
2.Determine the Timing
When did the issue occur?
Did the problem start immediately after you used ViveTool to enable or disable features?
Was there a specific feature you enabled before the issue started happening?
Tip: The more precisely you can pinpoint when the issue occurred, the easier it will be to identify which feature caused the problem.
3.Examine System Behavior After Changes
What happened after you ran ViveTool?
Did the system reboot properly after enabling a feature?
Were there any warning messages or notifications?
Did certain apps or functions start malfunctioning after specific features were enabled?
Tip: Some issues might not appear immediately but only after the system has been used for a while. It’s helpful to monitor the system’s behavior over time.
4.Check for System Resource Usage
High CPU, RAM, or Disk Usage: Some features enabled by ViveTool could impact system performance. Check Task Manager to see if system resources are being overly consumed.
Tip: Open Task Manager (Ctrl+Shift+Esc) and monitor the Performance tab to see if the CPU, memory, or disk usage spikes after enabling certain features.
5.Use Logs to Diagnose Issues
Event Viewer: Windows logs errors and system events that can help you trace what caused the issue.
Steps:
Press Win + X and select Event Viewer.
Look under Windows Logs > System for error entries that may have occurred around the time of the issue.
Tip: Look for entries labeled “Error” or “Warning” that are tied to system performance or application crashes. These can provide more details about what caused the malfunction.
6.Reproduce the Issue
Replicate the Problem: If the problem isn’t immediately obvious, try to reproduce it.
Re-enable or disable specific features one at a time using ViveTool and see if the issue reappears.
This can help you isolate which particular feature caused the issue.
Tip: If you enabled multiple features, enable them one by one and check your system’s response each time.
7.Use Built-in Windows Tools
Check for Windows Updates: Sometimes, system issues can be related to missing updates or patches. Ensure your system is fully up to date by checking Settings > Update & Security > Windows Update.
Run System Diagnostics: Use built-in tools like the Windows Memory Diagnostic or Disk Check to identify if there are underlying hardware or system issues.
Disable the Problematic Feature
ViveTool causes issues on your system, the first step in resolving the problem is to disable the problematic feature you enabled. This approach allows you to isolate the cause of the issue without affecting other settings or features. Here’s how you can disable a problematic feature using ViveTool:
1.Identify the Problematic Feature
Before disabling any features, it’s essential to understand which one might be causing the problem. This could be the most recent feature you enabled or one that seems to have caused noticeable system instability, such as slowdowns, crashes, or other odd behaviors.
Tip: If you’re unsure which feature caused the issue, you can disable features one by one to isolate the problem.
Tip: Check your system logs, as they may provide clues about which feature caused the issue (e.g., error messages or system failures).
2.Open Command Prompt or PowerShell as Administrator
ViveTool requires administrative privileges to make changes to system features, so you must run Command Prompt or PowerShell with elevated permissions.
Steps:
Press Windows + X and select Command Prompt (Admin) or Windows PowerShell (Admin).
If you’re using Windows 11 or later, you might only see PowerShell. Either will work for ViveTool commands.
3.Use the vivetool Command to Disable the Feature
Once you’ve identified the problematic feature, you can use ViveTool to disable it.
Command Format:
- cmd
- Copy
- Edit
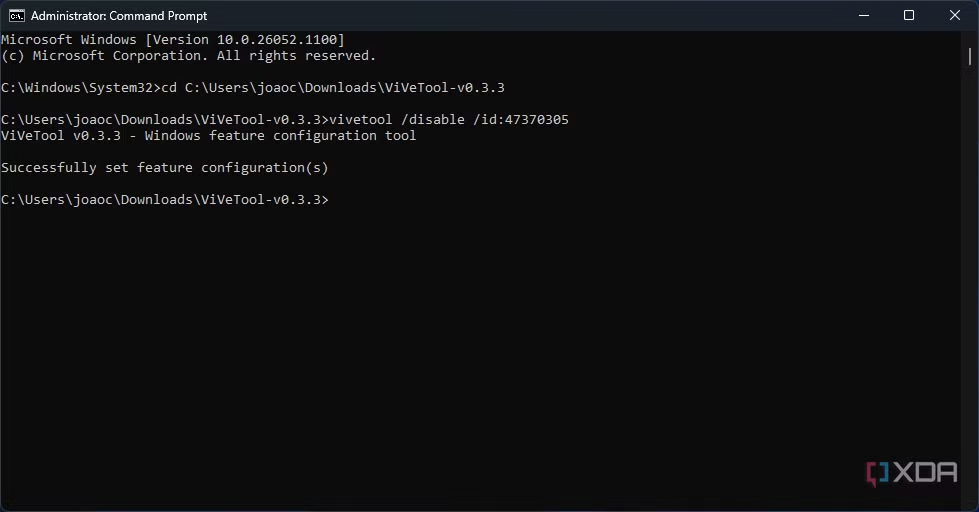
- vivetool /disable /id:
- Replace with the ID of the feature that you want to disable.
Example:If the problematic feature’s ID is 12345678, the command would look like this:
- cmd
- Copy
- Edit
- vivetool /disable /id:12345678
Tip: If you’re unsure about the Feature ID, you can list all enabled features with the vivetool /query command. This will display the IDs of features that have been activated on your system.
4.Restart Your Computer
After disabling the problematic feature, it’s important to restart your system to ensure the changes take effect. Some features may require a reboot for the system to fully revert.
Tip: A restart helps clear any temporary processes associated with the feature, ensuring that it is fully disabled.
5.Verify the Change
After restarting, you should check whether the issue is resolved. The system should be more stable if the problematic feature was successfully disabled.
Steps:
Monitor your system for stability issues (e.g., crashes, slowness).
If the system is now functioning correctly, then the feature you disabled was likely the cause of the issue.
Tip: If you’re unsure, you can enable the feature again using the same command but with /enable instead of /disable. This helps in confirming the feature as the root cause.
6.Additional Troubleshooting
If disabling the feature doesn’t resolve the issue, or if you’re still facing system instability, you can:
Try disabling additional features you recently enabled.
Consider rolling back to a system restore point if the issue persists (explained in the next section).
Roll Back to a System Restore Point
When you make changes to your system, such as enabling experimental features through tools like ViveTool, sometimes those changes can cause issues like instability or crashes. If you encounter problems, one effective way to revert your system to a previous stable state is by using System Restore. This process allows you to undo any recent changes without affecting your personal files.
Here’s how you can roll back to a system restore point:
What is a System Restore Point?
A System Restore Point is a snapshot of your system’s settings and configuration at a specific time. It allows you to revert the system to that state if something goes wrong after you make changes, such as installing software or enabling features with ViveTool.
When you perform a system restore, the following happens:
Windows Settings: The system’s settings will revert to how they were at the time of the restore point.
Installed Programs: Any programs or updates installed after the restore point will be removed, but your personal files (like documents and pictures) remain unaffected.
System Files and Drivers: Any changes to system files or drivers are reverted to the state they were in at the restore point.
How to Roll Back to a System Restore Point:
1.Open the System Properties Window
Press Windows Key + S to open Search.
Type “Create a restore point” and select it from the search results.
This will open the System Properties window under the System Protection tab.
2.Access System Restore
In the System Properties window, click the button labeled System Restore… under the System Protection section.
A new window will appear prompting you to choose between using a recommended restore point or choosing a different one.
3.Choose a Restore Point
Recommended Restore: Windows will usually recommend the most recent restore point. If you believe the issue started recently, you can choose this.
Choose a Different Restore Point: If you need to go further back in time to when your system was stable, click this option.
A list of available restore points will appear. Select a restore point that was created before the problem started (for example, before you used ViveTool).
Note: If no restore points are listed, it could be because System Restore is not enabled, or there are no previous restore points available.
4.Start the Restore Process
After selecting the appropriate restore point, click Next and then Finish to begin the process.
A warning message will appear telling you that System Restore cannot be undone. Confirm that you want to proceed by clicking Yes.
5.Wait for the Restoration Process
The system will restart, and the restore process will begin. This may take several minutes to complete, depending on the size of the changes being reverted.
Once the process is done, your system will boot back up, and you should see a message confirming that the system was successfully restored.
6.Verify the Results
After the restore, check if the issues caused by ViveTool have been resolved. Your system should now be back to the state it was in before you made the changes.
If the problem persists, you might need to try a different restore point or consider additional troubleshooting.
Important Notes:
Personal Files: System Restore does not affect your personal files, such as documents, pictures, or music. Any programs or updates installed after the restore point will be removed.
Frequency of Restore Points: Windows automatically creates restore points periodically, such as before installing updates or significant system changes. If you haven’t been using system restore often, or it was disabled, you might not have many restore points available.
No Restore Point?: If there are no restore points listed, you might need to enable System Restore or create restore points manually in the future to ensure you’re protected.
Revert ViveTool Changes
ViveTool has caused issues or if you simply want to undo the changes you’ve made, you can revert the modifications made to your system by disabling the features you’ve enabled. Here’s how you can go about it:
1.Query Enabled Features
Before reverting the changes, it’s important to know which features you’ve enabled. ViveTool has a command that allows you to query all the active features on your system.
Command:
- cmd
- Copy
- Edit
- vivetool /query
This will list all the enabled features along with their Feature IDs.
Explanation: The /query command displays a list of all features that have been modified with ViveTool, showing whether they are enabled or disabled. This is important because you’ll need the Feature IDs for each feature that you want to disable.
2.Disable Individual Features
Once you’ve identified which features you’ve enabled, you can disable them one by one using their Feature IDs.
Command:
- cmd
- Copy
- Edit
- vivetool /disable /id:
- Replace with the actual ID of the feature you want to disable.
Example: If you enabled a feature with the ID 123456, the command would be:
- cmd
- Copy
- Edit
- vivetool /disable /id:123456
Explanation: Disabling a feature will revert its effect, turning it off and potentially resolving any instability caused by that feature.
3.Disable All Enabled Features
If you enabled multiple features and are unsure which one caused the problem, or if you simply want to revert all the changes, you can disable all enabled features. This will undo every modification made by ViveTool.
Method:
Use the list of enabled features from the /query command.
For each enabled feature, run the disable command with its Feature ID.
Note: This can be time-consuming if many features were enabled, but it’s the most thorough way to revert all changes.
4.Restart the System
After disabling features, a system restart is typically required for the changes to take effect.
Action: Restart your computer to apply the changes and make sure that the issues caused by the enabled features are resolved.
5.Revert to Default System Settings
If manually disabling features doesn’t resolve your issues, you might want to consider reverting to the default system settings. This could involve:
System Restore: Using a restore point to roll back the system to a previous stable state before any changes were made with ViveTool.
Reinstall Windows: If necessary, you can reinstall Windows to remove any lingering issues and start fresh.
6.Confirm System Stability
After reverting changes, test your system for stability and ensure that no problems persist. If everything runs smoothly, then the changes have been successfully undone.
Key Considerations:
Backup Data: Always create a system restore point before enabling or disabling features with ViveTool. This helps you recover your system if something goes wrong.
Incremental Changes: It’s a good idea to enable or disable features one at a time to help narrow down any issues and prevent system instability.
Use Caution: Since ViveTool manipulates experimental features, it’s always advisable to use it on a test system or create a full backup in case of unexpected behavior.
Update or Reinstall Windows
This section explains two key recovery options—updating and reinstalling Windows—to resolve persistent issues caused by using ViveTool. It is aimed at users who are unable to resolve system instability or functionality problems through simpler steps like disabling features or restoring the system.
1.Update Windows
Updating Windows is a less intrusive option that installs the latest updates, patches, and fixes, which might resolve the issues introduced by experimental features.
When to Update:
Your system is experiencing minor glitches or bugs.
You’re running an older version of Windows, and a newer stable version may resolve compatibility or stability issues.
You want to retain your personal files and settings while resolving the problem.
Steps to Update Windows:
Check for Updates:
Go to Settings → Update & Security → Windows Update.
Click on Check for updates.
Install Available Updates:
If updates are available, click Download and install.
Wait for the installation to complete, and restart your system when prompted.
Verify:
After the update, check if the issues are resolved.
Benefits:
Fixes known bugs and security vulnerabilities.
Retains your personal files, apps, and settings.
Simple and quick process.
2.Reinstall Windows
Reinstalling Windows is a more comprehensive solution. It involves replacing your current Windows installation with a fresh copy, which removes all changes made by ViveTool and ensures system stability.
When to Reinstall:The system remains unstable or unresponsive after trying other fixes.
Multiple features enabled via ViveTool have caused widespread issues.
You want a completely clean slate for your system.
Options for Reinstallation:
Reset This PC:
Preserves your files but reinstalls Windows and removes apps/settings.
Steps:
Go to Settings → Update & Security → Recovery.
Under Reset this PC, click Get started.
Choose Keep my files or Remove everything, depending on your preference.
Follow the prompts to reset your system.
Clean Install:
Deletes everything and reinstalls Windows from scratch.
Steps:
Create a bootable USB drive using the Windows Media Creation Tool or Windows 11 Download.
Boot from the USB drive.
Follow the on-screen instructions to format your drive and reinstall Windows.
Note: Backup your files before proceeding, as this process erases all data.
Benefits:
Fully restores system stability and removes all unwanted changes.
Ensures no lingering effects from experimental features or misconfigurations.
Precautions for Both Methods:
Backup Your Data: Always back up your important files to an external drive or cloud storage before updating or reinstalling.
Drivers and Apps: After reinstalling, you may need to reinstall your apps and drivers.
Stay Updated: Regularly check for updates to keep your system secure and stable.
Seek Community Support
This section aims to help users troubleshoot ViveTool-related issues by leveraging the knowledge and experience of online communities. It emphasizes collaboration, directing users to relevant resources where they can ask questions, find solutions, or learn from others who have faced similar issues.
1.Why Seek Community Support?
Purpose:
To find tailored advice or fixes that aren’t available in general documentation.
To gain insights from others who have used ViveTool and may have encountered similar problems.
Benefits:
Access to a large pool of users and experts.
Potentially quicker solutions for uncommon or complex issues.
2.Where to Seek Help?
Official ViveTool GitHub Repository:
URL: https://github.com/thebookisclosed/ViVeTool
What to Do:
Check the Issues tab for similar problems.
Open a new issue describing your problem if no solution exists.
Include details like your Windows version, the Feature ID, and error messages.
Community Forums:
Reddit:
Subreddits like r/Windows10 or r/Windows11.
What to Do: Post a question explaining the issue and the steps you’ve taken. Be specific to get meaningful responses.
Microsoft Forums:
Visit Microsoft Answers to ask for assistance from Windows enthusiasts and professionals.
Tech Enthusiast Communities:
Websites like TechNet or Stack Exchange (e.g., Super User).
3.What Information Should You Provide?
To get the best help, include the following details when seeking support:
System Information:
Your Windows version (e.g., Windows 11 Insider Preview Build 25931).
Problem Description:
Explain the issue clearly (e.g., “System crashes after enabling a feature with Feature ID 12345”).
ViveTool Usage:
Mention the commands used (e.g., /enable /id:12345).
Troubleshooting Steps:
Describe what you’ve already tried (e.g., disabling the feature, restoring the system).
4.Etiquette and Tips
Be Patient: Community members may take time to respond.
Be Respectful: Thank users who offer help, even if their advice doesn’t resolve your issue.
Stay Informed: Share updates on your problem resolution so others can benefit from your experience.
5.When to Escalate
If community support doesn’t help, consider:
- Contacting Microsoft Support for Insider-related issues.
- Reverting to a stable version of Windows to avoid further disruptions.
Prevent Future Issues: A Guide to Avoid Problems
This section offers practical tips and best practices for minimizing risks when using ViveTool to experiment with hidden or experimental features in Windows.
1.Always Create a System Restore Point
Why: A system restore point acts as a safety net. If something goes wrong, you can revert your system to a working state.
How to Create a Restore Point:
Open the Start Menu and search for “Create a restore point”.
Select your system drive (usually C:) and click Create.
Provide a descriptive name, such as “Before ViveTool Changes.”
Click Create to save the restore point.
Tip: Always do this before enabling or disabling features.
2.Enable Features One at a Time
Why: Making multiple changes at once can make it difficult to identify which feature caused an issue.
How:
Enable one feature using the command:
- cmd
- Copy
- Edit
- vivetool /enable /id:
Restart your system and observe its behavior before enabling another feature.
3.Research Feature IDs Before Enabling Them
Why: Not all features are stable or safe to use. Some may be incomplete or incompatible with your system.
How:
Look for verified and well-documented Feature IDs shared by trusted sources (e.g., ViveTool GitHub page or reputable forums).
Avoid enabling unknown or experimental features unless you’re prepared to troubleshoot issues.
4.Test on a Secondary or Virtual Machine
Why: Experimental features can cause serious issues, so it’s safer to test them on a system you don’t rely on daily.
How:
Set up a virtual machine (e.g., using Hyper-V, VirtualBox, or VMware).
Install the Windows Insider build in the virtual environment.
Use ViveTool in this isolated setup before applying changes to your main system.
5.Keep Track of Changes
Why: Documenting what you’ve enabled helps you troubleshoot more easily if something goes wrong.
How:
Maintain a simple log (e.g., a text file) where you record Feature IDs, descriptions, and dates of changes.
Example log entry:
- yaml
- Copy
- Edit
- Date: Jan 19, 2025
- Command: vivetool /enable /id:123456
Description: Enabled hidden File Explorer tabs feature.
6.Regularly Update Windows
Why: Experimental features are often tied to specific Windows builds, and newer updates may fix bugs or improve feature compatibility.
How:
Go to Settings > Update & Security > Windows Update and check for updates regularly.
Ensure you’re using the latest Insider or stable build as appropriate.
7.Avoid Enabling Features on Production Systems
Why: A production system (used for work or critical tasks) should remain stable and reliable. Experimental features can compromise this stability.
Alternative: Use ViveTool only on test systems or systems where downtime is acceptable.
8.Understand the Risks
Why: Knowing the potential consequences can help you prepare for and mitigate issues.
Potential Risks:
System instability or crashes.
Features that don’t function as intended.
Difficulty in reverting changes.
conclusion
ViveTool is a valuable utility for unlocking experimental Windows features, but it requires caution to avoid potential issues. If problems arise, start by identifying and disabling the problematic feature using ViveTool commands. For more complex issues, revert your system to a prior state using a system restore point or roll back all changes made by ViveTool. If these steps don’t resolve the issue, updating or reinstalling Windows can restore stability.
To prevent future complications, always create a restore point before using ViveTool and enable features one at a time to isolate potential problems. Engaging with the ViveTool community or Windows forums can provide additional guidance and insights. With responsible usage and proper precautions, you can safely experiment with hidden features while minimizing risks to your system.